 Meet the Sea Goddess!
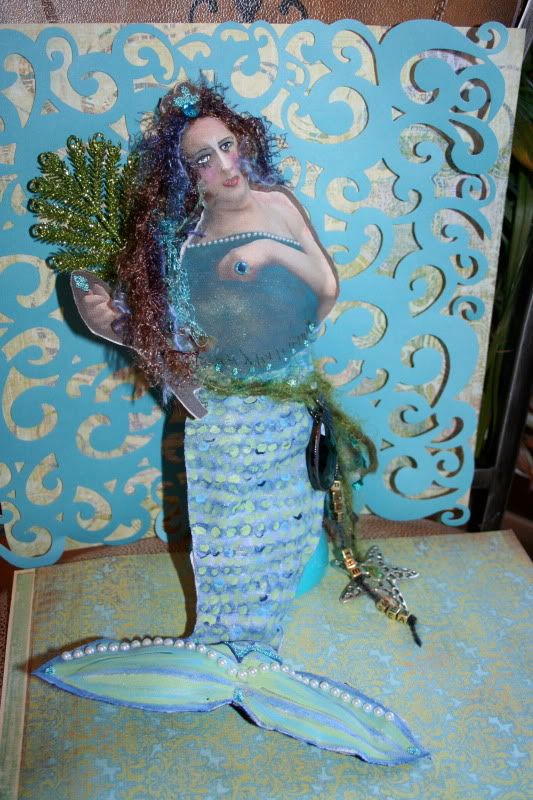
Challenge 11 – 3-D Figure (jointed, pattern, stuffed, simple/complicated, on stand, wall display, sitting, painted, glued, stitched, very open options, etc…)
Theme – Gods & Goddesses (human, animal, cultural myth, invented, etc…)
Required material – Fibers (ribbon, yarn, string, lace, floss, cord, etc…)
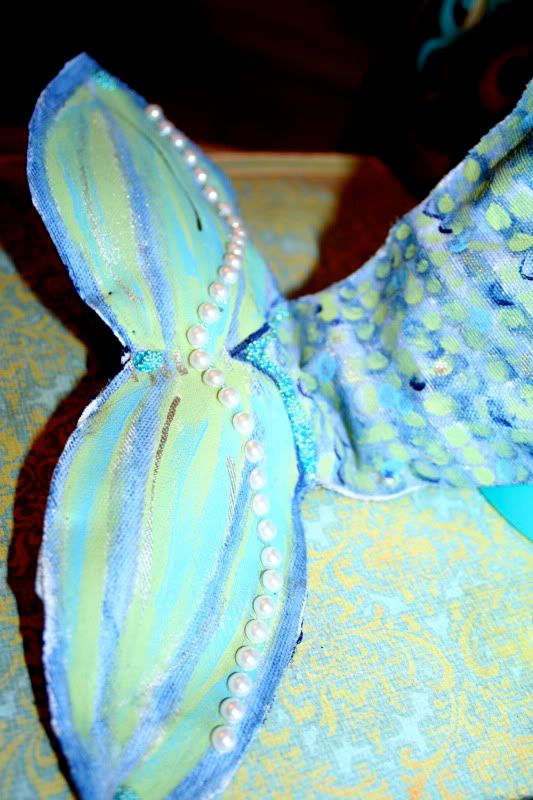
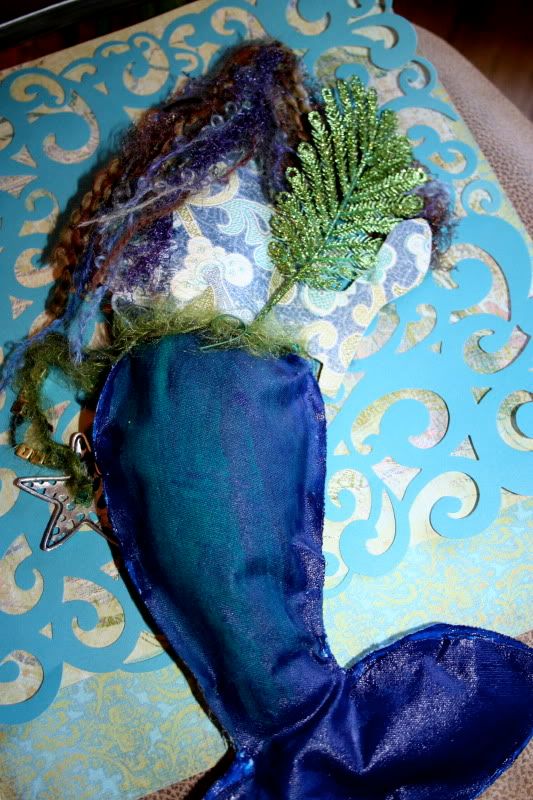
All I can say about this piece is that it definitely was a challenge to me. I had the concept in my head but wasn't sure how to go about creating it since I can't sew!! I did my best and that's all that matters, right? Since I can't sew I was stumped. Then I had an epiphany on how I was going to create a "stuffie" so to speak. I remembered an issue of Stuffed Magazine where Claudine Hellmuth demonstrated an easy piece of art using her Sticky Back Canvas. So that's what I did! I cut out her tail and started drawing on it with the neocolors to create scales and then went back over it with water to soften it. When that was dry I painted extra acrylic over it. I found the vintage image of the top of the mermaid's body and printed it out on the sticky backed canvas and from there just started cutting and creating the rest of the mermaid. This mermaid is definitely the American-sized one! LOL I didn't mean to make her so large she just turned out that way. I had some batting from a cheap pillow and stuffed her right up!
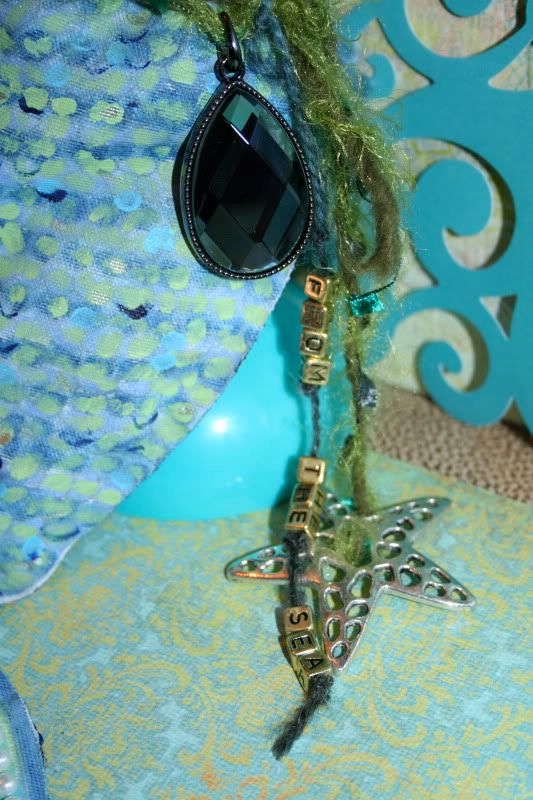
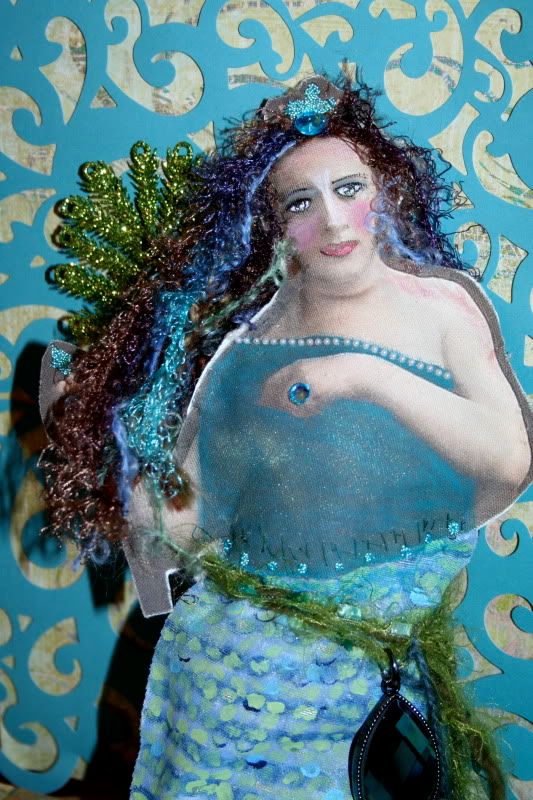
My concept worked mostly but then I realized I had to sew the top of the body (printed part) to the lower part, I hand stitched it and got lots of cuts! Once that was accomplished I started to piece her together slowly. Instead of painting the back of her (top) I used colorful/matching paper to add more texture and detail. The hardest part of this piece was making sure she stayed together and that's where the pins came in. I glued (with gel medium) her up all around the edges because the sticky part of the canvas wasn't enough to hold it all with the batting. Once glued I pinned her up like a pattern would be and let it dry for quite some time. This piece was constantly needing to be reinforced (PATIENCE)!! Once she was put together I started embellishing and painting. The embellishing was the most fun. I found jewelry findings that fit my theme and just started playing around. I painted in her face and added more details, glued on the fibers for her hair and even gave her a sparkly ring! The options are endless. Just have fun in the process and remember to stay patient if you try this at home. I was super frustrated and uninspired at times but I think the outcome was worth it! What do you think?? If you have any questions feel free to ask me!
Supply List:
Claudine Hellmuth Sticky Back Canvas Size 12 x 12
sewing pins
needle/(heavy duty) thread
scrapbooking paper
fibers for hair and belt
digital vintage image to print on the canvas
stick on pearls
Martha Stewart Luster Glass Microbeads in Feldspar
Stick on gems
Pearl Ex
Sparkly glitter glue, used an aqua color
Acrylics - I used Claudine Hellmuth Studio paints and Steward Gill Byzantia paint
Black pen for details
Caran d'ache Neocolor crayons for the mermaid scales
paint brush
jewelry findings
Golden Gel Matte Medium
batting
Left over Christmas Ornament
LOTS of PATIENCE!!!!
NOW IT'S YOUR TURN TO CREATE!!! GO CREATE SOMETHING AMAZING!!!! I hope I inspired you!
Official Rules:
The winner of this challenge will receive a $20 Gift Card to shop like a Bad Girl in the Bad Girl Shoppe! Be sure to leave a blog comment here first!
- Follow the challenge guidelines exactly
- Post your project in the specific "Project 52" gallery with the title "Challenge #11 - 3D Figure" before March 20th Midnight Pacific Time
- Link your layout to the Challenge #11 Thread in the Project 52 forum